CitraVR is available now for Quest headsets and these instructions can help you get it installed via sideloading. Here’s how to find, install, and configure the CitraVR Nintendo 3DS emulator for your Meta Quest 2, 3, or Pro.
What Is CitraVR?
CitraVR is an open source project released by Amanda Watson in early 2024 and is a fork of the existing open-source Citra emulator that started development in 2013. Each project is aimed at emulating the Nintendo 3DS, with CitraVR specifically described by its creator as “designed for playing 3DS homebrew and personal game backups in 3D on the go with your Quest.”
CitraVR isn’t something you’re going to find on the main Quest Store or even App Lab at this point, and that means you’re going to need to sideload. Here are the four steps you’ll need to follow to get CitraVR up and running on a Quest headset.
If you prefer audio and video instructions, we’ve embedded video below walking through the steps in about three minutes. Otherwise, we’ve got them outlined below:
Install CitraVR
Sideloading on a Quest headset requires signing up as a developer and setting up developer mode. You’ll also ideally have a PC or Mac and a USB cable handy because this is what you’ll use to transfer the needed files.
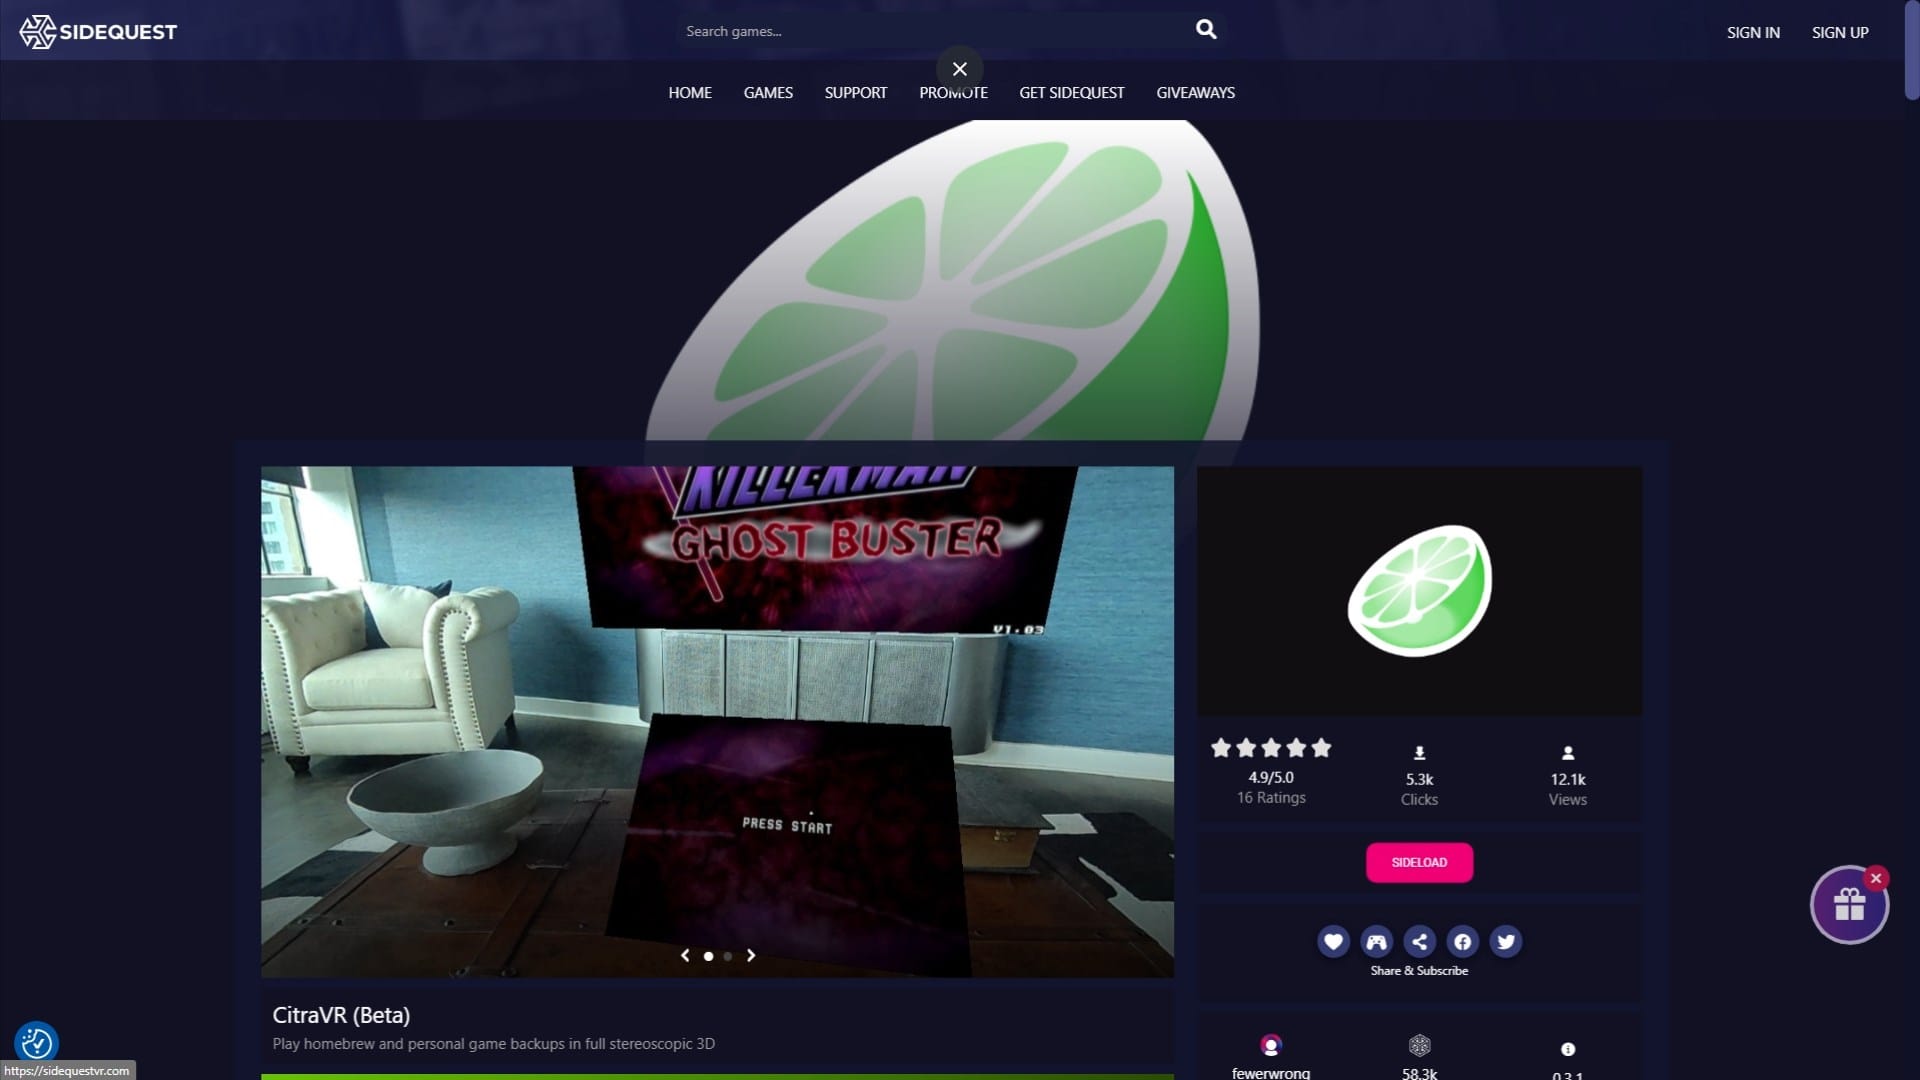
There are a couple of different methods for getting CitraVR installed, but SideQuest is easiest and instructions for using it are also listed on the wiki for the CitraVR page.

Step 1: Set Up Developer Mode
The first step to install CitraVR is that you’re going to need to either create or log into an account at the Oculus developer site. If you’ve already done this, then feel free to skip to step 2.
We’ve got expanded instructions here just on sideloading if you need a little more help, but the important bit for you here is to “visit this page and make sure you’re logged into the same Oculus/Facebook account that your Quest is registered to. Enter a new organization name and tick the ‘I understand’ box to agree to the Oculus Terms of Service.”
You can now grab your phone and log into your meta app for the next step to actually activate developer mode on the headset you’re using.
You do this by going to Devices menu in the app. Select your headset, and then you’re going to go to the headset settings and find the developer mode tab, where you’ll see a toggle switch to enable it.

Step 2: Sideload The Emulator
You’ll need USB cable with a USB-C connector on at least one end to connect your PC or Mac to the Quest headset.
If you are sure you’re in developer mode from Step 1 you can now connect your headset to a PC over that USB cable with SideQuest installed. This stops a lot of people up, so the way to confirm you’ve done Step 1 right is that when you plug the headset into your computer the Quest headset will display a dialog inside mentioning an RSA key to allow debug access. You’ll see this dialog especially if this is your first time doing this.
Now the Quest headset is ready to receive sideloaded content.
The easiest way to get the CitraVR.apk to the Quest now is over that USB cord from SideQuest installed on your PC or Mac.
SideQuest is available here.
You can remove the headset and then go back to SideQuest and just click the button that says Sideload, and that’s it. In a matter of a few seconds, it’s installed and you’re done.

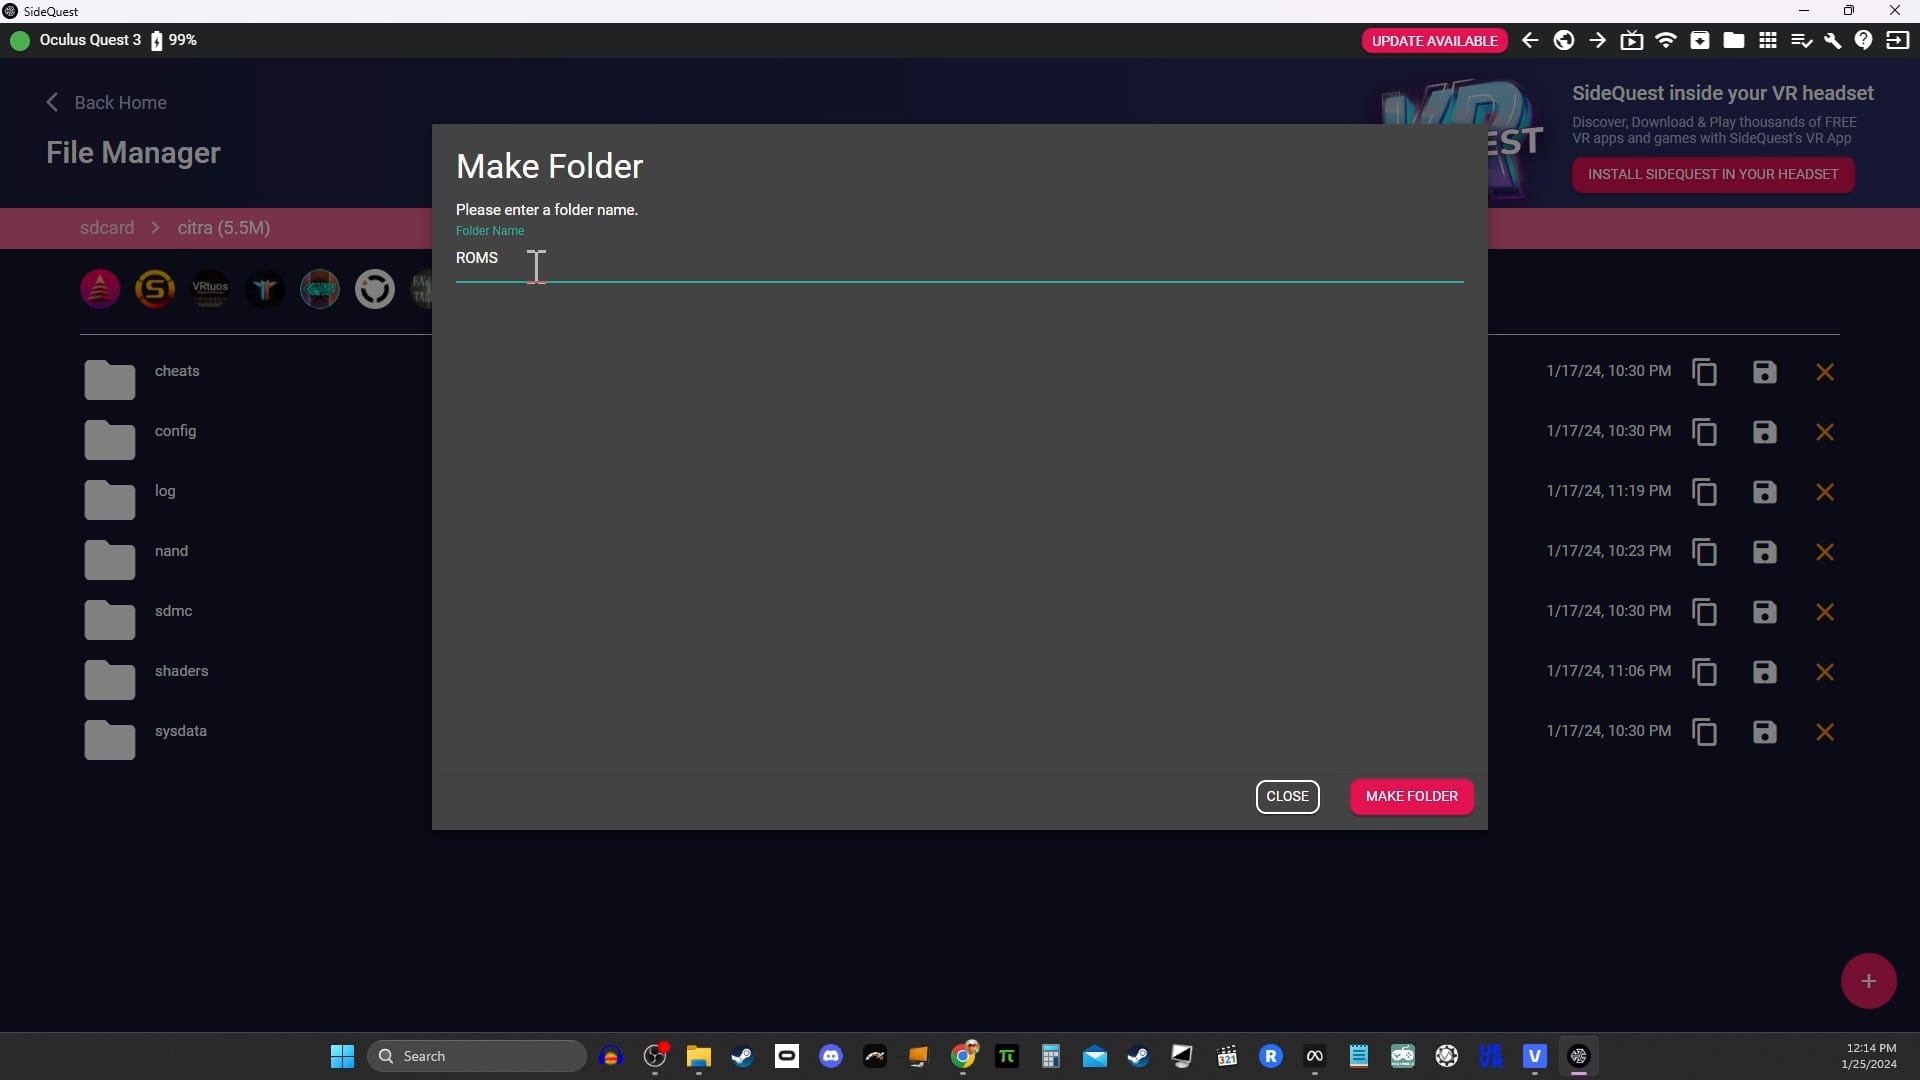
Step 3: Create A ROMs Folder
After the installation is done, there’s only one more step to get the emulator up and running, and that is to create a folder to store your games in.
So, with your headset still connected to the PC, you’re going to want to use the file browser feature of SideQuest to create this new folder in the right spot for CitraVR.

Step 4: Launch The Emulator From Unknown Sources
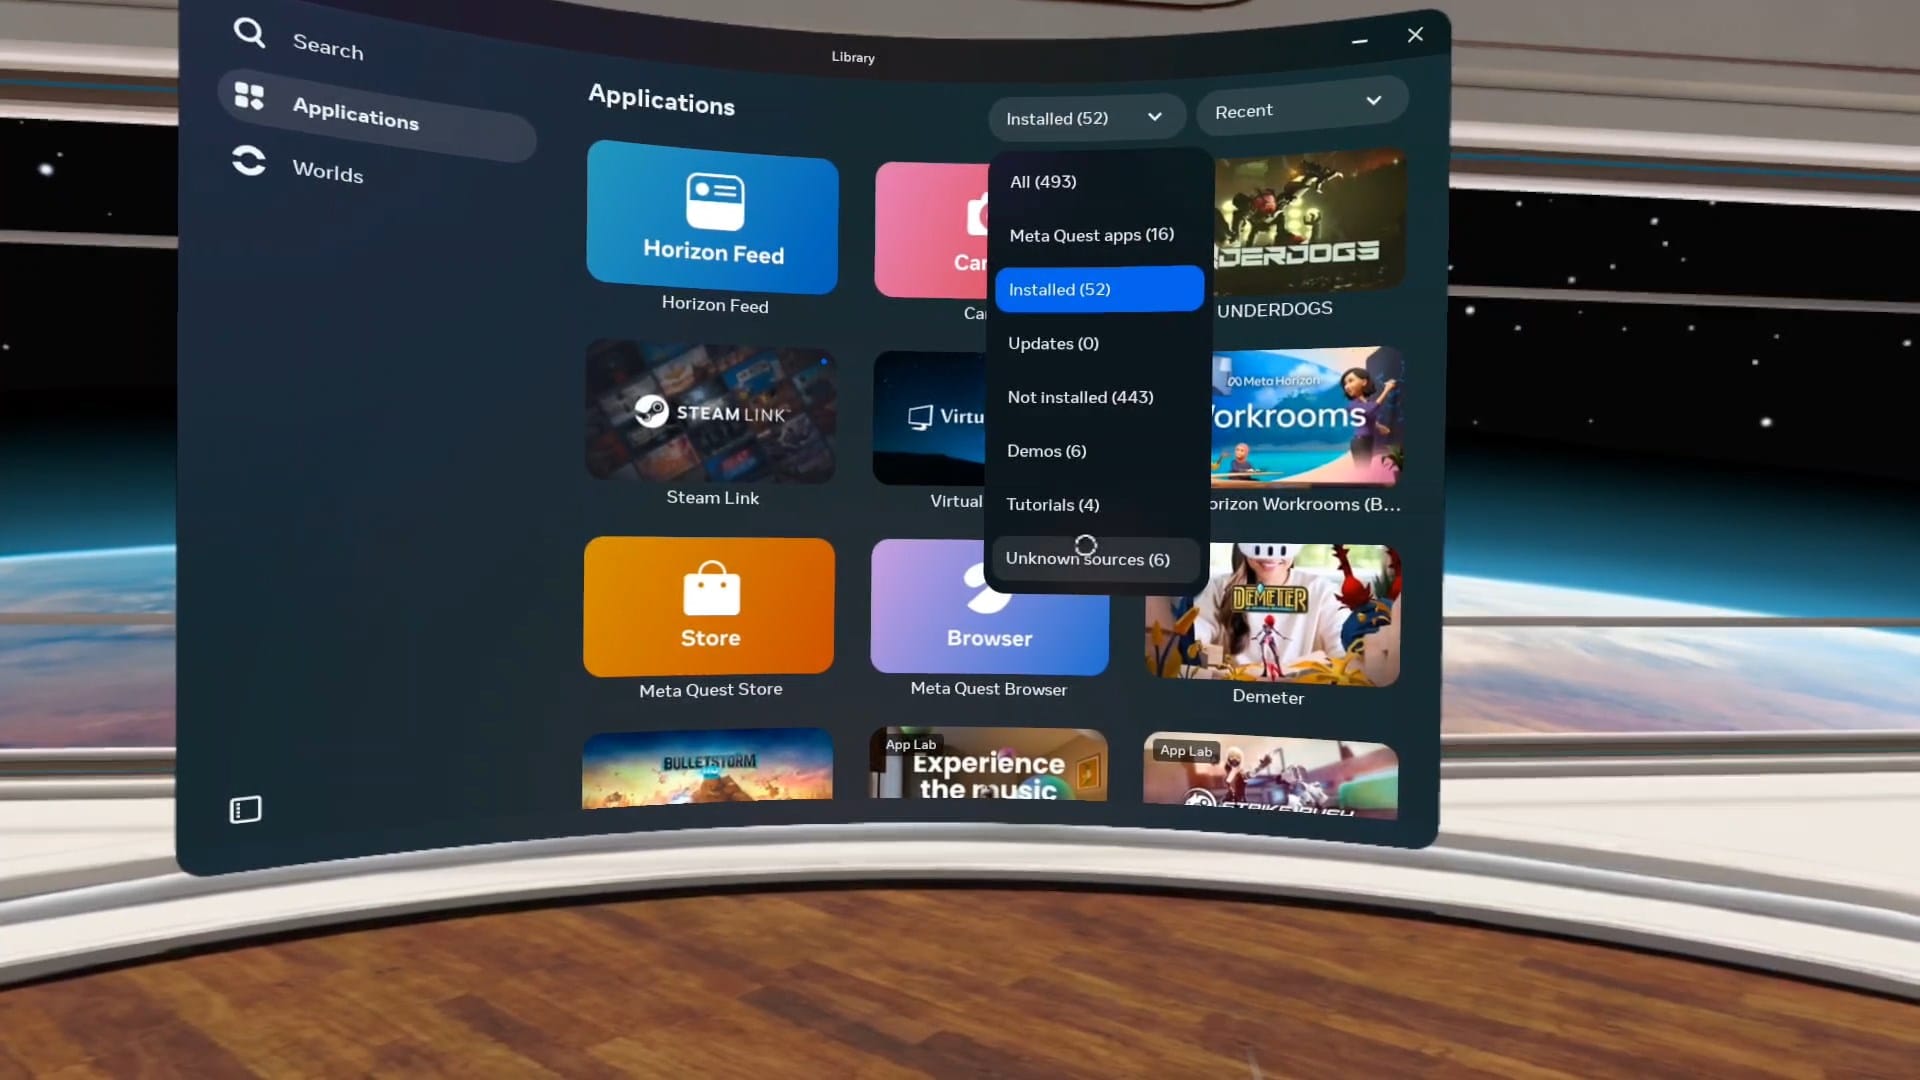
Now that everything is set up it is time to finally put on your headset and launch up the emulator. Before you get discouraged and start thinking something has gone wrong because you can’t seem to find the app, be aware that CitraVR isn’t going to be in the normal games and apps list.
In order to find it, we’re going to need to select unknown sources from the dropdown menu.
Once there, you should be able to see that Citra VR is indeed installed and ready to start.
After you launch it for the first time, you’ll need to accept a few permissions, and then point CitraVR toward your newly-created ROMs folder.
Now you are ready to play.
This article was originally published on uploadvr.com